Sooo... I'm at a tee total loss. The bike is back together and I've not got a sliver of a part of a small bit of the shadow of an idea how.
The curbside of the forks was together days ago. The road side refused to go. I broke down and ordered the pro tool which required waiting a week for it to arrive. When it did it was the wrong "drive" so I had to hunt up an adapter for it...
Then I went to assemble the fork tube... and the PRO tool wouldn't hold! ARRRRRRGGGGGHHHHHH!!!!
I had help to hold the holder and no matter what I/we did... nada... it wouldn't go together. Frustrated and angry I called it quits at dark. Went over and sat under the shredded awning and sipped a beer... stewing in my own juice.
Shortly after dawn I walked back over to give it one last solo try... and failed again. That damned tube just kept turning. No Joy.
So there I am... bike sitting on a jack. One tube that isn't and won't go together and stumped and frustrated and fresh out of any ideas....
Absent mindedly I picked up a wrench... and just went to turn that bolt again, and turn the damper rod, while trying to come up with another "idea"... and with NO HOLDER in the tube... the damper rod wouldn't turn? Locked up solid... WTF???!
I picked up the torque wrench and put it on... and CLICK! with NO DAMPER ROD HOLDER IN PLACE...not one damn thing to hold it... and it didn't/wouldn't turn...
So now, I'm kinda freaked; Did I screw something up and have the forks all jammed up?
No... it works like it's supposed to, both sides... Weirdness... checking the other tube it wouldn't turn either???... IDK. I've no freaking idea what or why or when or how...
I only know... the forks weren't together... and then they WERE... and I didn't do a damned thing... but... I'll take it! I hurried and got the oil in and leveled, the wheel and fender and brakes on... got her back together... and then gingerly rode a hundred miles... testing to see all was "Right"...
The brakes work. The forks work. No leaks. No Squeaks. No heat... just... doing what it's supposed to do...
Then yesterday I climbed on and went on a nice wide circle.
Ran up Hwy 287 through Laramie. Rolled out Hwy 130 through Centennial and climbed up into the Snowies...
You're just over 10,000 feet up in Snowy Range pass on top... Far Country that soothes the soul of a grumpy old puss gut like me!
Coming down off the west side of the Snowies I caught Hwy 230 just a little below Saratoga and turned south for Walden in the North Park country of Colorado.
Grab some fuel there and came back east on Hwy 14 over Cameron Pass, another 10,000+ footer... and down the Poudre Canyon back to Fort Collins.
That's a nice run down the canyon... until you get to the lower end...and then all the cagers who can't go around a 35 mile an hour bend at 25 without hitting their brakes kinda mess with the day... :)
Buuuut... bottom line... a few hundred miles on my unknown-how-I-did-it repair... and all is good. Awesome!
Grab Your Handles and Ride
Brian
Showing posts with label Motorcycle Maintenance. Show all posts
Monday, July 21, 2014
Sunday, July 13, 2014
Remember Maxwell Smart?
What's he got to do with Motorcycles you ask?
"Missed it be THAT much!" Just imagine Max's voice :)
I haven't gotten Sonja put back together yet...
But I came close... I found a five dollar tool for plumbing (a nipple extractor) that gripped the curbside damper rod perfectly, allowing me to torque the bolt holding the tubes together...
That center offset section "cams" or turns eccentrically and wedges into smooth round holes to grip.
A small collection of extensions gave me the length needed to reach down inside the fork...
The first tube was torqued in but a few seconds... so excited that I'd have her back together in another hour or so I slid the contraption down the second tube and turned it to lock in place... and turned it to lock in place... and turned it, and turned it... and whispered a curse... and turned it...
Nothing! What worked 100% perfect a foot away in the other identical tube... wouldn't grip even a slight bit in the second... arrrrrrgggggghhhhhh!
Sooooo... I spent five hours running around, calling, walking through tool/hardware stores trying to scheme and option... went back to the garage and tried again... fail... ugh...
I smell that sorry little irish again. Who else do you know, 'cept for me, takes a two hour job and converts it into a three week ordeal? That pest Murphy has GOT to be mixed up in this ;)
Well... I finally surrendered and called Motorcycle Superstore to order the "Pro" tool... which of course they have to get from THEIR supplier... which is identical to the plumbing tool I used to sell in MY hardware days... which they no longer manufacture as a Five dollar plumbing tool.
Nope... it's a $25 dollar Motorcycle Damper Rod Holder tool! or more if you go to the wrong place. :) So... I wait another week for the HOPEFULLY last tool to arrive so I can put my girl back together!
I did succeed in finding a boot that will, also Hopefully, protect the forks from future premature fork seal failure from dirt...
I located a pair of what were manufactured as Rancho Suspension Shock boots that fit near perfectly. They'll keep grit and rocks and bugs from either dingin' the tubes or getting into the seals and causing future leaks.
Kinda old school and I'm sure the chrome and flashy paint boys will thumb their noses... but then... I've never seen the chrome and flashy paint boys on the roads I ride. :) How-some-ever... I HAVE seen plenty of grit and rocks and bugs...
... and it wasn't just in my bed roll!
Another week and she'll be healthy again... my fingers are tightly crossed... Until then... I walk over to the garage twice a day and ring that gremlin bell you can see danglin' just under the frame below the gear lever...
Oh yeah... I don't think I told you here... maybe it was just on that "other" blog...The RV one ;) (that story starts here)... I'm still dealing with wasps on the roof of the rig that won't let me up there to do THAT maintenance either... So I built a tent to hang a pest strip in, and traps all around to kill the nasty little parasites...
Tough as they are... I'm more stubborn than they are (Yosemite Sam genetics prolly) and I'm winning that battle too, if slowly... My "bug tent" is knocking them down day by day...
Putting my frickin frackin motorcyclin' butt back in the wind will be a VERY appreciated day! :) ... even if it IS on a Yamaha... bwahahahahahahaha
Grab Your Handles and Ride!
Brian
"Missed it be THAT much!" Just imagine Max's voice :)
I haven't gotten Sonja put back together yet...
But I came close... I found a five dollar tool for plumbing (a nipple extractor) that gripped the curbside damper rod perfectly, allowing me to torque the bolt holding the tubes together...
That center offset section "cams" or turns eccentrically and wedges into smooth round holes to grip.
A small collection of extensions gave me the length needed to reach down inside the fork...
The first tube was torqued in but a few seconds... so excited that I'd have her back together in another hour or so I slid the contraption down the second tube and turned it to lock in place... and turned it to lock in place... and turned it, and turned it... and whispered a curse... and turned it...
Nothing! What worked 100% perfect a foot away in the other identical tube... wouldn't grip even a slight bit in the second... arrrrrrgggggghhhhhh!
Sooooo... I spent five hours running around, calling, walking through tool/hardware stores trying to scheme and option... went back to the garage and tried again... fail... ugh...
I smell that sorry little irish again. Who else do you know, 'cept for me, takes a two hour job and converts it into a three week ordeal? That pest Murphy has GOT to be mixed up in this ;)
Well... I finally surrendered and called Motorcycle Superstore to order the "Pro" tool... which of course they have to get from THEIR supplier... which is identical to the plumbing tool I used to sell in MY hardware days... which they no longer manufacture as a Five dollar plumbing tool.
Nope... it's a $25 dollar Motorcycle Damper Rod Holder tool! or more if you go to the wrong place. :) So... I wait another week for the HOPEFULLY last tool to arrive so I can put my girl back together!
I did succeed in finding a boot that will, also Hopefully, protect the forks from future premature fork seal failure from dirt...
I located a pair of what were manufactured as Rancho Suspension Shock boots that fit near perfectly. They'll keep grit and rocks and bugs from either dingin' the tubes or getting into the seals and causing future leaks.
Kinda old school and I'm sure the chrome and flashy paint boys will thumb their noses... but then... I've never seen the chrome and flashy paint boys on the roads I ride. :) How-some-ever... I HAVE seen plenty of grit and rocks and bugs...
... and it wasn't just in my bed roll!
Another week and she'll be healthy again... my fingers are tightly crossed... Until then... I walk over to the garage twice a day and ring that gremlin bell you can see danglin' just under the frame below the gear lever...
Oh yeah... I don't think I told you here... maybe it was just on that "other" blog...The RV one ;) (that story starts here)... I'm still dealing with wasps on the roof of the rig that won't let me up there to do THAT maintenance either... So I built a tent to hang a pest strip in, and traps all around to kill the nasty little parasites...
| *Bug tent on the 5th wheels roof surrounded by traps* |
Tough as they are... I'm more stubborn than they are (Yosemite Sam genetics prolly) and I'm winning that battle too, if slowly... My "bug tent" is knocking them down day by day...
Putting my frickin frackin motorcyclin' butt back in the wind will be a VERY appreciated day! :) ... even if it IS on a Yamaha... bwahahahahahahaha
Grab Your Handles and Ride!
Brian
Friday, July 4, 2014
Sometimes When it Comes to Motorcycle Maintenance... Cheap Don't Pay
Sometimes a guy just walks along shakin' his head... He's walkin'... cuz the bozo is too cheap for his own good.
Got the forks torn down with very little trouble really. Turned out I needed to enlist a buddy with an impact wrench to provide enough "ooomph" to pop the bolts that hold the forks together. To get them back together I've got to fabricate a "Damper tube holder".
Not a big deal... just one of the "lil' details" nobody seems to mention in their "Easy Job" write ups. ;)
I also need to break down and pick up at least a cheapie impact wrench...
The MAIN obtructification standing in my way is that bit of mush that slops around between my ears. A couple of weeks back when I ordered the fork seals... I was trying to be frugal, conservative... penny wise... yeah lots of fine sounding words that mostly mean tight wad dumb ass to cheap for his own good! ;)
What I DIDN'T order were fresh bushings. Dumb move. When I got the forks apart it was clear and plain they were worn way to much to leave... so they've been ordered now and I wait again for new parts.
In the mean time I decided to make an "Old School" modification to protect those fork seals in the future.
I started hunting around for fork boots.
Only... near as I can tell, Nobody builds any that fit the forks of a Yamaha Raider...
Most of my life, spent on the ranches, has been figgerin' ways to make what you HAVE, do the job you need it to do. So I've developed a pretty good ability to find new parts that were mistakenly believed to be something else!
Like Rancho Truck Shock Boots. Those aren't shock boots! Them there are Yamaha Raider Fork Boots! :)
Yup... their nice rubber boots fit like a freakin' glove. Takes a good bit of effort to get that skinny end started but once you do it fits like it was designed for the purpose.
I'll zip tie the ends with black ties (which will be nigh on to invisible) and dirt getting to the fork seals will not be a problem in the future!
Suh-Wheet!
Now I know... Rubber boots are not gonna appeal to folks that are all into chrome and polish, and I understand that, and that's fine.
But me? I'm into snoopin' around back roads. Signs that say "Pavement ends" don't turn me back like they tend to do for the spit and polish boys...
The only problem with that is, my ride tends to experience a bit more grit and grime than the average big red cruiser..
This bike is gonna take me back to Alaska again... it's gonna take me hopefully to the Maritimes... and lots of other places in between... and lots and lots of Places and visions those riders that have to fret about their chrome will never see...except in the pictures made by nut jobs like me. :)
Grab Your Handles and Ride
Brian
Got the forks torn down with very little trouble really. Turned out I needed to enlist a buddy with an impact wrench to provide enough "ooomph" to pop the bolts that hold the forks together. To get them back together I've got to fabricate a "Damper tube holder".
Not a big deal... just one of the "lil' details" nobody seems to mention in their "Easy Job" write ups. ;)
I also need to break down and pick up at least a cheapie impact wrench...
The MAIN obtructification standing in my way is that bit of mush that slops around between my ears. A couple of weeks back when I ordered the fork seals... I was trying to be frugal, conservative... penny wise... yeah lots of fine sounding words that mostly mean tight wad dumb ass to cheap for his own good! ;)
What I DIDN'T order were fresh bushings. Dumb move. When I got the forks apart it was clear and plain they were worn way to much to leave... so they've been ordered now and I wait again for new parts.
In the mean time I decided to make an "Old School" modification to protect those fork seals in the future.
I started hunting around for fork boots.
Only... near as I can tell, Nobody builds any that fit the forks of a Yamaha Raider...
Most of my life, spent on the ranches, has been figgerin' ways to make what you HAVE, do the job you need it to do. So I've developed a pretty good ability to find new parts that were mistakenly believed to be something else!
Like Rancho Truck Shock Boots. Those aren't shock boots! Them there are Yamaha Raider Fork Boots! :)
Yup... their nice rubber boots fit like a freakin' glove. Takes a good bit of effort to get that skinny end started but once you do it fits like it was designed for the purpose.
I'll zip tie the ends with black ties (which will be nigh on to invisible) and dirt getting to the fork seals will not be a problem in the future!
Suh-Wheet!
Now I know... Rubber boots are not gonna appeal to folks that are all into chrome and polish, and I understand that, and that's fine.
But me? I'm into snoopin' around back roads. Signs that say "Pavement ends" don't turn me back like they tend to do for the spit and polish boys...
The only problem with that is, my ride tends to experience a bit more grit and grime than the average big red cruiser..
| *Up in the Yukon* |
Grab Your Handles and Ride
Brian
Saturday, June 28, 2014
Today I Take the Plunge into a Bit More Intense Motorcycle Mechanicing
A mechanic I don't claim to be. I've never truly ruined anything...but I have had a redo or two. I'm hoping I don't have that tribulation with this Forks rebuild.
Got back from a short mountain trip yesterday afternoon and picked up the parts to start that job today.
Yamaha called a few days ago to tell me the parts were in, just as I was just getting BACK to our camp near Red Feather after a run to the lowlands.
I had to go down to find a pair of fresh Vent Covers...
...after a hail storm took out my awning and both roof vents the evening before... arrrrrrrgggghhhhhh....
Yeah... all those "points of light"in the awning...
...are NOT supposed to be there.
The next morning when we opened the door my granddaughter says "look! Stars!" :)
So this morning I'll study the how-to's I've saved... and then with a deep breath I'll start pulling things apart to replace those fork seals.
I heard it described fairly accurately I think; "The fork systems on a motorcycle are some pretty complicated technology but they only use a few really simple parts"
Let's hope that guy was right and a puss gut mountain cowboy biker can take 'em apart and put 'em back together again without some sort of a humpty dumpty sitchy-ashun developing over there in the garage.
Grab Your Handles and Ride
Brian
Got back from a short mountain trip yesterday afternoon and picked up the parts to start that job today.
Yamaha called a few days ago to tell me the parts were in, just as I was just getting BACK to our camp near Red Feather after a run to the lowlands.
I had to go down to find a pair of fresh Vent Covers...
...after a hail storm took out my awning and both roof vents the evening before... arrrrrrrgggghhhhhh....
Yeah... all those "points of light"in the awning...
...are NOT supposed to be there.
The next morning when we opened the door my granddaughter says "look! Stars!" :)
So this morning I'll study the how-to's I've saved... and then with a deep breath I'll start pulling things apart to replace those fork seals.
I heard it described fairly accurately I think; "The fork systems on a motorcycle are some pretty complicated technology but they only use a few really simple parts"
Grab Your Handles and Ride
Brian
Wednesday, June 18, 2014
Yosemite and Me Be Saddle Pards
Trobairitz's comment yesterday made me giggle; "For some reason I picture Yosemite Sam stomping around cussing..."
I'm pretty sure neighbors might have been wonderin' 'bout the blue smoke and little symbols floatin' over the trees... %#@%!!! &$*%@#!!! &%$@@@!!!
... TARNASHUN! SATAN! You Gol Durn Red Headed VAR-MINT!
Show your Gawd Damn Face you pig eyed, spavined, knock kneed, two bit, parsimonious boot lickin' back stabbin tweaker of a yellow hearted DOG!
COME OUT and stand me to my Face!!!!
You foul Smellin' dry gulchin' Skunk! You an' ME is 'bout to have us a gen-U-wine Western difficulty! I'm a gonna teach you a new dance you ugly, worm riddled son-of-sow-bellied SNAKE!
Yep... kinda lightened up my day considerable... :)
After some study of the sitchy-a-shun... I went on down to Yamaha and got the parts ordered... as well as the seal driving tool... using the dinero that was SUPPOSED to be fueling my run through the wind.
Once again, Sonja sits over in Evin's garage waiting on parts to put her road ready. Be some time next week when she'll go back on the jack and I'll tear the forks apart to put 'em right.
Thanks Trobairitz
Grab Your Handles and Ride
Brian
I'm pretty sure neighbors might have been wonderin' 'bout the blue smoke and little symbols floatin' over the trees... %#@%!!! &$*%@#!!! &%$@@@!!!
... TARNASHUN! SATAN! You Gol Durn Red Headed VAR-MINT!
Show your Gawd Damn Face you pig eyed, spavined, knock kneed, two bit, parsimonious boot lickin' back stabbin tweaker of a yellow hearted DOG!
COME OUT and stand me to my Face!!!!
You foul Smellin' dry gulchin' Skunk! You an' ME is 'bout to have us a gen-U-wine Western difficulty! I'm a gonna teach you a new dance you ugly, worm riddled son-of-sow-bellied SNAKE!
Yep... kinda lightened up my day considerable... :)
After some study of the sitchy-a-shun... I went on down to Yamaha and got the parts ordered... as well as the seal driving tool... using the dinero that was SUPPOSED to be fueling my run through the wind.
Once again, Sonja sits over in Evin's garage waiting on parts to put her road ready. Be some time next week when she'll go back on the jack and I'll tear the forks apart to put 'em right.
Thanks Trobairitz
Grab Your Handles and Ride
Brian
Sunday, June 15, 2014
Itchty and Antsy... I'm Ready For The Road...
Wednesday morning I'll swing a leg, twist the throttle and put it in the wind.
Yesterday Sonja got her fresh oil to ready her for the road. I hope she appreciates it. At better than $10 a quart and needing better than five quarts (more than my old 390 cubic inch V8 Hot rod from years ago!!)...
... Oil changes are a pricy bit of maintenance!
Especially when you move away from Dino oil and go full synthetic... This is my first full syn run... buuut it's supposed to be better on your machine. Since I seem to be a lil' hard on 'em... I finally decided I should go with some of the more modern technology.
That's not an easy task with a Raider neither!
That bike has THREE drain plugs! and of course, they're set right where the jack needs to be to lift the bike high enough off the ground so you can swing a wrench... since two of 'em are on the side tucked in between the crankcase and the frame...
So... you have a bit of a balancing act to get the bike up straight... and just high enough to clear for the drain pan and wrench access... which puts it kinda far back...
It be a bit spooky workin' under near 800 lbs as it teeters and wiggles balanced up on that jack. :) Her tires are barely touching the ground. Only lift a couple inches... But I got her done with no great excitement so she's ready to roll!
Finished up checking and rechecking my gear... almost couldn't stop just swinging a leg and leaving early!!!
Though I'm only rolling for a week... That load is actually sufficient for a run to Alaska! ;) I've distilled it again after all these years... I carried too damn much clothes to the Yukon... Three/Four days of changes is plenty... you just hit a laundry a lil oftener. ;)
Oh yeah... I found a bit of special gear that is, so far, pretty cool.
I was watching a movie just last week; "Lone Survivor"... The tale of Marcus Lutrell and what I think is a pretty awesome movie. One lil' thing caught my eye... which has nothing to do with that story...
All of those guys, Warriors in the Finest Sense of the word, were all wearing Mechanix brand gloves. I did a lil snooping and discovered they have a style that they call "Tactical"... that has good finger and knuckle protection for soldiers/sportsmen etc.
Then being textile, they should be a lot more comfortable in summer weather. You can find 'em in cammo prints too, not just black.
I've seen MECHANIX gloves many times before... made for mechanics... but those were bright blue and such... never gave 'em a thought...
But these... they call the M-pact style.
Fit like a "Glove" :) are comfortable and even have a vibration absorbing pad material on the palms...
The two pads are a "Poron" material under the synthetic "leather" that are supposed to soak up vibration and impact...
... and it don't hurt that they look Bad Ass ;) and are priced at Sportsman's Warehouse at just $25 bucks.
Even us poor boys can afford that!
... So now it's watch the clock... watch the calendar... and get ready to put my knees in the wind again.
Grab Your Handles and Ride
Brian
Yesterday Sonja got her fresh oil to ready her for the road. I hope she appreciates it. At better than $10 a quart and needing better than five quarts (more than my old 390 cubic inch V8 Hot rod from years ago!!)...
... Oil changes are a pricy bit of maintenance!
Especially when you move away from Dino oil and go full synthetic... This is my first full syn run... buuut it's supposed to be better on your machine. Since I seem to be a lil' hard on 'em... I finally decided I should go with some of the more modern technology.
That's not an easy task with a Raider neither!
That bike has THREE drain plugs! and of course, they're set right where the jack needs to be to lift the bike high enough off the ground so you can swing a wrench... since two of 'em are on the side tucked in between the crankcase and the frame...
So... you have a bit of a balancing act to get the bike up straight... and just high enough to clear for the drain pan and wrench access... which puts it kinda far back...
It be a bit spooky workin' under near 800 lbs as it teeters and wiggles balanced up on that jack. :) Her tires are barely touching the ground. Only lift a couple inches... But I got her done with no great excitement so she's ready to roll!
Finished up checking and rechecking my gear... almost couldn't stop just swinging a leg and leaving early!!!
| *Sonja be like; "Le's go dude!" |
Though I'm only rolling for a week... That load is actually sufficient for a run to Alaska! ;) I've distilled it again after all these years... I carried too damn much clothes to the Yukon... Three/Four days of changes is plenty... you just hit a laundry a lil oftener. ;)
Oh yeah... I found a bit of special gear that is, so far, pretty cool.
I was watching a movie just last week; "Lone Survivor"... The tale of Marcus Lutrell and what I think is a pretty awesome movie. One lil' thing caught my eye... which has nothing to do with that story...
All of those guys, Warriors in the Finest Sense of the word, were all wearing Mechanix brand gloves. I did a lil snooping and discovered they have a style that they call "Tactical"... that has good finger and knuckle protection for soldiers/sportsmen etc.
Then being textile, they should be a lot more comfortable in summer weather. You can find 'em in cammo prints too, not just black.
I've seen MECHANIX gloves many times before... made for mechanics... but those were bright blue and such... never gave 'em a thought...
But these... they call the M-pact style.
Fit like a "Glove" :) are comfortable and even have a vibration absorbing pad material on the palms...
The two pads are a "Poron" material under the synthetic "leather" that are supposed to soak up vibration and impact...
... and it don't hurt that they look Bad Ass ;) and are priced at Sportsman's Warehouse at just $25 bucks.
Even us poor boys can afford that!
... So now it's watch the clock... watch the calendar... and get ready to put my knees in the wind again.
Grab Your Handles and Ride
Brian
Monday, May 26, 2014
I Can See The Light At The End of The Tunnel...
... hopefully it's not a Freightliner goin' the wrong way.
The fiberglassed signal light recesses got bondoed... re-bondoed... and then spot puttied...
... and primered...
... and still... I can't but admit... there are blemishes if you look.
A body man I ain't... but it'll keep the rain and dust out.
The finish paint was put on yesterday... in enough time that I could get the garage door closed before the days storm arrived.
That few additional coats of epoxie paint will have to cure for a couple of days before I go to handling it much doing the reinstall.
... as well as the installing the new turn signals and license plate carrier frame I'm waiting on from J & P cycles...
In the mean time I've been conjuring ways to carry my auxiliary fuel bottles on long rides...
How I carried them to Alaska worked pretty well. But, I've not got that ruck any more... (that's a picture of it that generally comes in the popular posts gizmo on the right sidebar)
I've thought of racks bolted on somewhere... or plates zip tied under the new tail rack that will be going on shortly... but... nothing seemed to fit or "Feel" right...
So... with the painting done and a storm brewing... I took to experimenting with a piece of old canvas I had stuffed in a compartment, my fuel bottles and some barge cement.
One thing I'd decided was I didn't want a "permanent" mount.
No need to carry those bottles on day rides...
Only when I'm gonna be out in unfamiliar country and long rides where I might find a stretch with 150 miles 'tween filling stations.
Like on that return ride I'm planning on making to the Yukon and Alaska...
That brought me back to that ruck mounted carry.
I've drawn up all sorts of complicated racks with clamps and straps and pockets and ... to hell with all that... I decided that simple and easily replaced if it wears out, breaks, is stolen or I simply want to try something new... is best...
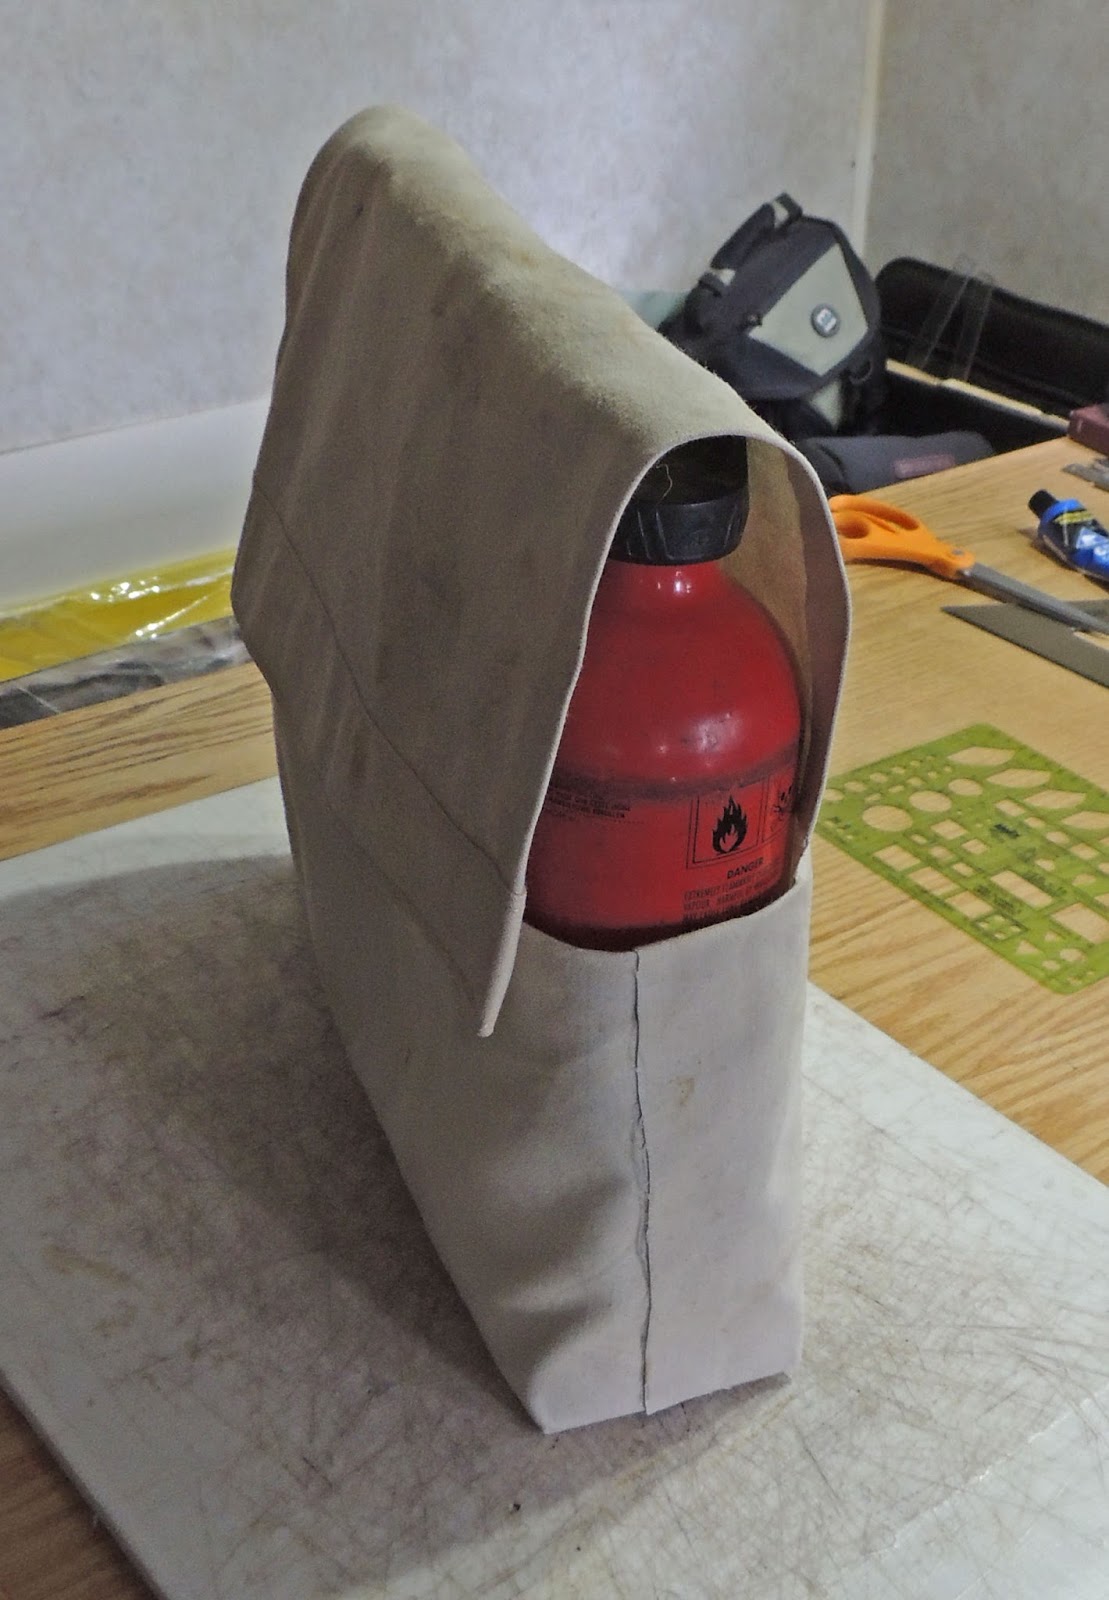
So... I've got most of a prototype, auxiliary, fuel bottle bag worked up. The idea being that it will strap/clip to my current ruck sitting on the tail rack, or whatever cargo bag occupies that space...
One piece of canvas cut to fold and glue/stitch/rivet into a bag that will hold the bottles securely but still allow easy access.
I'm planning on adding a quick release strap running from side to side through the loops in the caps to assure retention...
And still need to add a couple straps to close the flap and straps that will secure the fuel bag to whatever part of the camp cargo I tie it too... and probably soak it in some black or OD dye ;) ... and... set some rivets to make sure the barge don't let things go... but not too bad for 45 minutes of fiddling with canvas and cement.
Need to get her done... and on the road again...
Grab Your Handles and Ride
Brian
The fiberglassed signal light recesses got bondoed... re-bondoed... and then spot puttied...
... and primered...
... and still... I can't but admit... there are blemishes if you look.
A body man I ain't... but it'll keep the rain and dust out.
The finish paint was put on yesterday... in enough time that I could get the garage door closed before the days storm arrived.
That few additional coats of epoxie paint will have to cure for a couple of days before I go to handling it much doing the reinstall.
... as well as the installing the new turn signals and license plate carrier frame I'm waiting on from J & P cycles...
In the mean time I've been conjuring ways to carry my auxiliary fuel bottles on long rides...
How I carried them to Alaska worked pretty well. But, I've not got that ruck any more... (that's a picture of it that generally comes in the popular posts gizmo on the right sidebar)
I've thought of racks bolted on somewhere... or plates zip tied under the new tail rack that will be going on shortly... but... nothing seemed to fit or "Feel" right...
So... with the painting done and a storm brewing... I took to experimenting with a piece of old canvas I had stuffed in a compartment, my fuel bottles and some barge cement.
One thing I'd decided was I didn't want a "permanent" mount.
No need to carry those bottles on day rides...
Only when I'm gonna be out in unfamiliar country and long rides where I might find a stretch with 150 miles 'tween filling stations.
Like on that return ride I'm planning on making to the Yukon and Alaska...
That brought me back to that ruck mounted carry.
I've drawn up all sorts of complicated racks with clamps and straps and pockets and ... to hell with all that... I decided that simple and easily replaced if it wears out, breaks, is stolen or I simply want to try something new... is best...
So... I've got most of a prototype, auxiliary, fuel bottle bag worked up. The idea being that it will strap/clip to my current ruck sitting on the tail rack, or whatever cargo bag occupies that space...
One piece of canvas cut to fold and glue/stitch/rivet into a bag that will hold the bottles securely but still allow easy access.
I'm planning on adding a quick release strap running from side to side through the loops in the caps to assure retention...
Need to get her done... and on the road again...
Grab Your Handles and Ride
Brian
Wednesday, May 21, 2014
Um... Yeah... so... about having things buttoned up in the next day or so...
Yeah... Not gonna happen. It's kinda becoming the refinish that won't quit.
While waiting for paint to dry ;) so I can put a hopefully last coat on and bring the saddlebags to a uniform finish... I decided to back up a couple of steps and change some things around.
Fact is, I've never been really happy with the built in turn signals on those Tsukayu Coner Saddlebags. The way they're fit in there... IDK... they just haven't "worn" well on me...
They don't seal tight either so dirt gets in there and just looks wrong around the fringes of the lens.
I also decided I didn't like the license plate hanging down under, and the way I had to get a wire to it...
So... I decided I'd take out the factory signals... order a new set from J&P cycles... as well as a replacement Radiantz license plate frame, to replace the existing one which broke a wire.
There's a lil problem with that simple fix.
The factory signals are set into pockets molded into the fiberglass... But that's shouldn't really be a problem, not with me being such a whiz Body Man... Right?
NOT! ...
I gave some thought to just covering the old lights with ... something... but that would be double tacky... so then the real brainstorm... this is going south in a hurry...
"I'll just cover those recesses over, body man and all"... right? ha ha ha... yeahhhhh...
Just pull the lenses... cut out the LED boards inside...
And cover over the recesses with fiberglass...
... and some bondo...
and some paint... Easy... Ha Ha Ha....
The plan was/is... to just set the fiberglass on that ledge just below flush with the surface of the bag. I don't want to have to deal with blending fiberglass into that surface if I laid it across the top of the pocket. So I'll just lay it up to the edge of the pocket.
I should have plenty of surface there on that ledge for a secure bond...Then just level it up with a thin layer of bondo and sand her smooth.
Soooo... I scraped and sanded off the paint and primer down to the gel coat... and hung some glass...
I brushed some resin onto the ledge... then put a layer of resin saturated glass mat in. Stuck the old lens in there for a bit of rigidity... and then another layer of glass mat over that... all bonded to that wide ledge.
I'd thought a mite about cutting out the pockets.... but to be honest... I'm not sure how it's set into the body... or what I'd get into with that hole... and having to deal with the carpet liner inside the bag (cuz I'd have to put glass on both sides)... so I just decided that pocket ain't takin' up much space. ;)
You mix the resin and you've got maybe ten minutes to get things where they need to be before that stuff sets up. Sometimes trying to get a little piece of glass cloth to lay where you want it while you try to cover it with more resin is like trying to untangle a birdsnest knot of fishing line in your reel... with your toes... drunk...
... on a windy day... while riding to town on a pogo stick...
Well... I've got fiberglass curing now... I'll smooth that up a bit, bondo and sand... and I'll be ready to re-repaint. ;) and then...
...When the new lights and License Plate frame get here... hang them on there and get 'em wired in.
At that point the scooter will be street legal again with some fresh makeup.
... unless of course... in the time between then and now... I change my damned mind again...
Grab Your Handles and Ride
Brian
While waiting for paint to dry ;) so I can put a hopefully last coat on and bring the saddlebags to a uniform finish... I decided to back up a couple of steps and change some things around.
Fact is, I've never been really happy with the built in turn signals on those Tsukayu Coner Saddlebags. The way they're fit in there... IDK... they just haven't "worn" well on me...
| *The bags in 2012* |
I also decided I didn't like the license plate hanging down under, and the way I had to get a wire to it...
So... I decided I'd take out the factory signals... order a new set from J&P cycles... as well as a replacement Radiantz license plate frame, to replace the existing one which broke a wire.
There's a lil problem with that simple fix.
The factory signals are set into pockets molded into the fiberglass... But that's shouldn't really be a problem, not with me being such a whiz Body Man... Right?
NOT! ...
I gave some thought to just covering the old lights with ... something... but that would be double tacky... so then the real brainstorm... this is going south in a hurry...
"I'll just cover those recesses over, body man and all"... right? ha ha ha... yeahhhhh...
And cover over the recesses with fiberglass...
... and some bondo...
and some paint... Easy... Ha Ha Ha....
The plan was/is... to just set the fiberglass on that ledge just below flush with the surface of the bag. I don't want to have to deal with blending fiberglass into that surface if I laid it across the top of the pocket. So I'll just lay it up to the edge of the pocket.
I should have plenty of surface there on that ledge for a secure bond...Then just level it up with a thin layer of bondo and sand her smooth.
Soooo... I scraped and sanded off the paint and primer down to the gel coat... and hung some glass...
I brushed some resin onto the ledge... then put a layer of resin saturated glass mat in. Stuck the old lens in there for a bit of rigidity... and then another layer of glass mat over that... all bonded to that wide ledge.
I'd thought a mite about cutting out the pockets.... but to be honest... I'm not sure how it's set into the body... or what I'd get into with that hole... and having to deal with the carpet liner inside the bag (cuz I'd have to put glass on both sides)... so I just decided that pocket ain't takin' up much space. ;)
You mix the resin and you've got maybe ten minutes to get things where they need to be before that stuff sets up. Sometimes trying to get a little piece of glass cloth to lay where you want it while you try to cover it with more resin is like trying to untangle a birdsnest knot of fishing line in your reel... with your toes... drunk...
... on a windy day... while riding to town on a pogo stick...
Well... I've got fiberglass curing now... I'll smooth that up a bit, bondo and sand... and I'll be ready to re-repaint. ;) and then...
...When the new lights and License Plate frame get here... hang them on there and get 'em wired in.
At that point the scooter will be street legal again with some fresh makeup.
... unless of course... in the time between then and now... I change my damned mind again...
Grab Your Handles and Ride
Brian
Monday, May 19, 2014
My Darlin' Sonja... is Comin' Back Together... Slowly
The boss was whuppin' on me today. Eight bolts. Eight bolts only. Took me all freakin' day. Four on the exhaust header pipes... Four where the pipes mount to the frame.
Lord... never thought fishing would be a part of motorcycle repairs... but fishing I went... to find the nuts that fell into the 'black hole'...
Of all those nuts/bolts... just one... was an effing son-of-a-bitch.
The rear nut on the back jug... It's the one that can't be got to.
I finally found for six bucks or so, a universal with a built in socket that I thought would be short enough to fit...
A couple of 'dress rehearsals' ended with the sorry damned nuts falling into a black friggin' hole...
You can see it under the exhaust port on the jug... I ran and got replacement nuts for those that fell into that hole...
But then I thought... what's the unintended consequences of leaving a couple nuts in a hole... inside an engine?...
Sooooo... I sat on a bucket and went to "fishishing" with a bent piece of wire... to hook those nuts out of the innards of my Darlin'...
Then... with some paper towels, plugging up that damned hole... I set to wrasslin', cursing, and jury rigging stick and tape gizmo's... to get the pipes re-situated onto my lil' Darlin's power plant.
I'm NOT a mechanic. A damned fine horseman. A superior soldier. A lousy half of a relationship... a fairly accomplished leather craftsman...
... but a mechanic... this puss gut cowboy biker ain't!
But... this is my Sonja. The Yamaha Mechanical sweetheart that carried me to Alaska and back... across the Arizona desert at 130 mph...
I have no option but to see she gets back together proper.
With bits of wire and tape to fish things into proper position... cursing and rolling 'round in the dirt of the shop... the pipes got reattached in proper position. and then... I started her! and she started! so the battery didnt' take a dump while she's been incarcerated on that damned jack!
I ran her up to a couple of thousand rpm for a while... and lasered the pipes with my tricky little laser thermometer...
The hottest the shroud got was 375 degrees at the head... a far cry from the 1000 degree rating the powder coating of the pipes is supposed to have... so... good so far. A foot or 18" from the head it was 150 degrees cooler. Excellent!
I stuffed my fingers into the space around the head to pipe connection...hunting for an exhaust leak around the compression washers that seal the headers to the heads... and could find nothing...
Good!
I love this bike... I know that sounds stupid... it's a machine... but damn... I love it.
I'm hunting some new led turn signals to put her saddle bags back together... but that's another problem...
... Lousy paint manufacturers... can't do THAT right...
I picked up two cans... of IDENTICAL paint... labeled the same... "satin black"... two cans in a row...
Crap!
The lid is obviously slicker and glossier... while the tub is ... right... flatter...
Two different finishes... in the SAME... paint. and, it being Epoxie paint... I have to wait another damned week to re re-paint... arrrrgggghhhhh....
but...
There is GOOD news!!!!
When Sonja fired up for the exhaust pipe test run... there was no smoke! I'm fearing a valve guide failure... but... no smoke! :) so... maybe... another miraculous Yamaha Self healing repair!!! :)
Tomorrow, maybe, the J&P cycle order of some sequential turn signal strips... and in a week or so... I'll have the machine that somehow, feeds my soul, back on the road...
Some more work yet to do...that she deserves...
Grab Your Handles and Ride
Brian
Lord... never thought fishing would be a part of motorcycle repairs... but fishing I went... to find the nuts that fell into the 'black hole'...
Of all those nuts/bolts... just one... was an effing son-of-a-bitch.
The rear nut on the back jug... It's the one that can't be got to.
I finally found for six bucks or so, a universal with a built in socket that I thought would be short enough to fit...
A couple of 'dress rehearsals' ended with the sorry damned nuts falling into a black friggin' hole...
You can see it under the exhaust port on the jug... I ran and got replacement nuts for those that fell into that hole...
But then I thought... what's the unintended consequences of leaving a couple nuts in a hole... inside an engine?...
Sooooo... I sat on a bucket and went to "fishishing" with a bent piece of wire... to hook those nuts out of the innards of my Darlin'...
Then... with some paper towels, plugging up that damned hole... I set to wrasslin', cursing, and jury rigging stick and tape gizmo's... to get the pipes re-situated onto my lil' Darlin's power plant.
I'm NOT a mechanic. A damned fine horseman. A superior soldier. A lousy half of a relationship... a fairly accomplished leather craftsman...
... but a mechanic... this puss gut cowboy biker ain't!
But... this is my Sonja. The Yamaha Mechanical sweetheart that carried me to Alaska and back... across the Arizona desert at 130 mph...
I have no option but to see she gets back together proper.
With bits of wire and tape to fish things into proper position... cursing and rolling 'round in the dirt of the shop... the pipes got reattached in proper position. and then... I started her! and she started! so the battery didnt' take a dump while she's been incarcerated on that damned jack!
I ran her up to a couple of thousand rpm for a while... and lasered the pipes with my tricky little laser thermometer...
The hottest the shroud got was 375 degrees at the head... a far cry from the 1000 degree rating the powder coating of the pipes is supposed to have... so... good so far. A foot or 18" from the head it was 150 degrees cooler. Excellent!
I stuffed my fingers into the space around the head to pipe connection...hunting for an exhaust leak around the compression washers that seal the headers to the heads... and could find nothing...
Good!
I love this bike... I know that sounds stupid... it's a machine... but damn... I love it.
I'm hunting some new led turn signals to put her saddle bags back together... but that's another problem...
... Lousy paint manufacturers... can't do THAT right...
I picked up two cans... of IDENTICAL paint... labeled the same... "satin black"... two cans in a row...
Crap!
The lid is obviously slicker and glossier... while the tub is ... right... flatter...
Two different finishes... in the SAME... paint. and, it being Epoxie paint... I have to wait another damned week to re re-paint... arrrrgggghhhhh....
but...
There is GOOD news!!!!
When Sonja fired up for the exhaust pipe test run... there was no smoke! I'm fearing a valve guide failure... but... no smoke! :) so... maybe... another miraculous Yamaha Self healing repair!!! :)
Tomorrow, maybe, the J&P cycle order of some sequential turn signal strips... and in a week or so... I'll have the machine that somehow, feeds my soul, back on the road...
Some more work yet to do...that she deserves...
Grab Your Handles and Ride
Brian
Sunday, May 11, 2014
SpringTime in the Rockies is Obstructing My Progress...
I got two coats of epoxy resin applied to the bad lid before things went south... Put the first coat on, and it was so cool it took overnight to cure.
So... I sanded it fairly smooth and after brushing on the second coat I hung a heat lamp to bring it along quicker.
I sanded that as best I could... but I was truly wanting to NOT sand off all the resin I'd just put on!
Along in here is where I've really remembered myself that I'm NOT a body man. ;) This is the second primer coat I've applied after filling with a spot glazing putty and sanding "defects" that the first coat made real clear!
I'll sand this and likely do one more spot glazing of any small lil' faults I find... then put on the finish coat of flat black I'm refinishing the bags with...
So... I'd been hoping to do that today... and that's where things went "south"...
Momma nature had somethin' else to say 'bout that. Never thought of the Ol' girl as bein' bitchy... but I'm gettin' weary of her "spring" weather.
Since that shop building over across the way there is unheated... the temperature is 'bout 30 if you're generous... and most of what I'm using says wait for it to be 60 or better...
THIS kinda shut down the works. :)
... and then it kept on snowin'... added a few inches of wet sloppy crap on top of this...
SO... I'm sittin' inside, drinkin' too much coffee and workin' on fiction books and other projects... waiting for spring to find it's way back to Colorado with enough energy to push this gol durn #@$% winter... OUT!
Grab Your Handles and Ride
Brian
So... I sanded it fairly smooth and after brushing on the second coat I hung a heat lamp to bring it along quicker.
| *Saddle bag lid with two coats of epoxy resin applied* |
I sanded that as best I could... but I was truly wanting to NOT sand off all the resin I'd just put on!
Along in here is where I've really remembered myself that I'm NOT a body man. ;) This is the second primer coat I've applied after filling with a spot glazing putty and sanding "defects" that the first coat made real clear!
I'll sand this and likely do one more spot glazing of any small lil' faults I find... then put on the finish coat of flat black I'm refinishing the bags with...
| *Sanding Primer applied* |
So... I'd been hoping to do that today... and that's where things went "south"...
Momma nature had somethin' else to say 'bout that. Never thought of the Ol' girl as bein' bitchy... but I'm gettin' weary of her "spring" weather.
Since that shop building over across the way there is unheated... the temperature is 'bout 30 if you're generous... and most of what I'm using says wait for it to be 60 or better...
THIS kinda shut down the works. :)
... and then it kept on snowin'... added a few inches of wet sloppy crap on top of this...
SO... I'm sittin' inside, drinkin' too much coffee and workin' on fiction books and other projects... waiting for spring to find it's way back to Colorado with enough energy to push this gol durn #@$% winter... OUT!
Grab Your Handles and Ride
Brian
Thursday, May 8, 2014
Starting The Saddlebag Refinish
Took off all the top coat and primer and much of the gel coat.
I'm choosing to leave some of that. I took off all the cracks in it... Soooo... I'm thinking I'm good. We shall see.
First coat of resin is on. But it's pretty cool so curing will take quite a bit longer.
Plan is to sand it with very fine paper and after cleaning that, apply a second thin coat.
I'll let that cure a few days before I prep and apply the new paint.
Speaking of which, I'm going a "cheaper" but what I think is more reasonably maintainable route this time around...
... More reasonable for "hard used" equipment I think. More on that saddle bag paint later. ;)
Grab Your Handles and Ride
Brian
I'm choosing to leave some of that. I took off all the cracks in it... Soooo... I'm thinking I'm good. We shall see.
First coat of resin is on. But it's pretty cool so curing will take quite a bit longer.
Plan is to sand it with very fine paper and after cleaning that, apply a second thin coat.
I'll let that cure a few days before I prep and apply the new paint.
Speaking of which, I'm going a "cheaper" but what I think is more reasonably maintainable route this time around...
... More reasonable for "hard used" equipment I think. More on that saddle bag paint later. ;)
Grab Your Handles and Ride
Brian
Saturday, May 3, 2014
A Wanderer and a Drifter
I've been wandering for the last four years... hell... that's really a lie... I've drifted since I was 14. I started wandering the Arizona desert then... Can't say as I've ever really stopped since.
Crossed the oceans... lost count of the miles...
I often think of setting up in a place that I find that's nice... even stop on occasion and start digging post holes... but soon... the sound of a truck up on the highway, or the lonesome wail of a train across the valley, the rumble of V-twin, starts that gnawing itch to roam working all over again.
My way isn't one that many can tolerate. Most need a "place" and a "home". Hell, the happiest I've been I was in a tent.
For me it's not about trying to get somewhere either. Actually, I don't like getting "There". What gnaws at me is the insatiable hunger to just keep moving.
There are those that call it a sickness... no Eagle would agree.
The thing about drifting and wandering is... keeping your nose in the wind and smelling the sweet scent of that special freedom that only a rover knows.
Last night, after a fine day of progress on several projects I was sitting outside, the first evening in a good while without a heilatious wind roaring in the trees, and sipping on a bottle of Tommy Knocker Brewery's finest... listening to my ipod... Bob Seeger... and just soaking up the space around me. It was a cloudy sky...
Suddenly... the sun broke through just before it settled behind the high peaks of the front range... Everything was lit in a golden hue... It was as if the Boss himself had set the world to glowing.
Right at that moment... a Bald Eagle sailed over the house I'm parked beside. My rig hides in a wind break that has protected that house for over a hundred years.
That Eagle soared just over the Top of that tree... He was lit in glittering gold by the setting sun and soared over me, against the wind, for long seconds before finally disappearing behind the windbreak behind me... An awesome sight.
What's that got to do with anything?
This. It's the sweet flavor of life...
Recently I stepped off the path that I've known was the right path for me... for a long time... I stepped off for the purpose of pursuing dollars... a fools mistake... and honestly... it ate a hole in me.
Not only that, I was going to sell one of my great joys... for what? a few thousand dollars that would what? hep me... maybe... make some more?...
There's one damned word for that... STUPID.
I've been working on refitting Sonja after a few years of lots of miles and deferred maintenance, planning on selling... and it's come to me... in the last weeks as I polished her wheels, got the pipes refinished, sanded the saddle bags, buffed the tarnished fins on the jugs... that... I just can not sell her.
It makes no sense to sell off parts of yourself... in pursuit of subsistence. You'd just end up with lots of groceries... for a guy that wasn't there any more.
No idea how I'm gonna get where I need to go... Only know it won't be by selling off precious bits of my self.
Grab Your Handles and Ride
Brian
Crossed the oceans... lost count of the miles...
I often think of setting up in a place that I find that's nice... even stop on occasion and start digging post holes... but soon... the sound of a truck up on the highway, or the lonesome wail of a train across the valley, the rumble of V-twin, starts that gnawing itch to roam working all over again.
My way isn't one that many can tolerate. Most need a "place" and a "home". Hell, the happiest I've been I was in a tent.
For me it's not about trying to get somewhere either. Actually, I don't like getting "There". What gnaws at me is the insatiable hunger to just keep moving.
There are those that call it a sickness... no Eagle would agree.
The thing about drifting and wandering is... keeping your nose in the wind and smelling the sweet scent of that special freedom that only a rover knows.
Last night, after a fine day of progress on several projects I was sitting outside, the first evening in a good while without a heilatious wind roaring in the trees, and sipping on a bottle of Tommy Knocker Brewery's finest... listening to my ipod... Bob Seeger... and just soaking up the space around me. It was a cloudy sky...
Suddenly... the sun broke through just before it settled behind the high peaks of the front range... Everything was lit in a golden hue... It was as if the Boss himself had set the world to glowing.
Right at that moment... a Bald Eagle sailed over the house I'm parked beside. My rig hides in a wind break that has protected that house for over a hundred years.
That Eagle soared just over the Top of that tree... He was lit in glittering gold by the setting sun and soared over me, against the wind, for long seconds before finally disappearing behind the windbreak behind me... An awesome sight.
What's that got to do with anything?
This. It's the sweet flavor of life...
Recently I stepped off the path that I've known was the right path for me... for a long time... I stepped off for the purpose of pursuing dollars... a fools mistake... and honestly... it ate a hole in me.
Not only that, I was going to sell one of my great joys... for what? a few thousand dollars that would what? hep me... maybe... make some more?...
There's one damned word for that... STUPID.
I've been working on refitting Sonja after a few years of lots of miles and deferred maintenance, planning on selling... and it's come to me... in the last weeks as I polished her wheels, got the pipes refinished, sanded the saddle bags, buffed the tarnished fins on the jugs... that... I just can not sell her.
It makes no sense to sell off parts of yourself... in pursuit of subsistence. You'd just end up with lots of groceries... for a guy that wasn't there any more.
No idea how I'm gonna get where I need to go... Only know it won't be by selling off precious bits of my self.
Grab Your Handles and Ride
Brian
Tuesday, April 29, 2014
I Keep On Keepin' On...
I keep making progress on the bike... in between the wind storms. I can honestly say I don't care much for such work in the jaws of a Rocky Mountain Wind... and the folks that sited this garage, being farm folk; that's the sort that spend their lives... living on the land... I have to say WTF?
... You Should know better! You don't site your doors facing the prevailing wind! I don't care if you ARE behind a windbreak... it's just dumb... Man... You open that door and those gusts come a whooshin' in and send stuff flying everywhere...
Yeah sure, there's lights inside and I COULD close the door... Lil' 60 watt bulbs ten feet in the air and spaced about fifteen feet apart. It's like trying to light up a stadium with a bic lighter. ;)
So anyway... I got to polishing on those Yamaha wheels.. Honestly, I thought I was pretty screwed...
They appeared to have gone through some sort of a warzone... and I never saw it... just saw the wheels after. No idea of where it happened.
They looked like gravel just got in there and rolled around for a few miles... 'cept... I was never in any when they got dinged up.
Figured it would take damn near grinding to bring 'em back to anything respectable...
Lucky for me, it was one more time I've been found to be wrong... As it turns out, Yamaha has 'em coated with some variety of clear coat.
I don't know what did the damage but the damage is only to that clear coat.
I found that wet sanding with a fine sponge sanding pad takes that finish off and leaves a nice clean undamaged wheel behind...
Cool...
It's not an especially quick process... I suppose it might be if I used a coarser sponge sanding pad? buuuuuut... My thinking is I can do a lot of damage a lot slower... with the fine pad. ;)
That allows me more time to catch my self doing something wrong so I can... STOP!
So... slowly I go.
Got back to work on the saddlebags today... wind or no wind... and no wind could only be called a wish... When I made a run for a bit more sandpaper and some dust masks... it was pushing that truck around...which weighing maybe 8500 or so, takes some doing!
But... I got the "Bad" lid stripped down to and through the Gel Coat where needed...
The more finish I took off the more cracks were revealed... as well as significant areas of pinholes.
The circled areas are where the cracks are... the "dotted" areas are some of the pinholed areas revealed when I started sanding the primer layer.
The gel coat on this particular lid seems to be total junk...
As soon as the top finish was gone and I started into the primer... the pinholes appeared...
...and penetrated a ways into the gel coat.
Luckily that ALL seems to be confined to the gel coat... which is the lighter blue colored area.
Where the cracking was the worst I took the gel coat clean off down to the fiberglass... which eliminated all those cracks. There seems to be no failure of the basic fiberglass itself, only a bad gel coat.
Thing is... THAT would have been clearly visible when it left the glass shop at Tsukayu and went to the paint shop to be primer painted. Either somebody didn't do his job or... company policy is screwin' the pooch (and the customer) just a bit.
Anyway, I finished taking off ALL of that grey layer, which is the primer...
So now the damaged lid is ready to coat with a layer or two of resin to seal it up.
Then primer and repaint...
Along with repainting the other lid and two tubs.
And then get 'em all hung back on the bike.
Tsukayu warranty is only 6 months. So... a "Good" price is not so good... when you have a failure at about 18 months of age that they won't make right... Life in the west.
The scrubbing of the fins on the jugs is going slowly too... that west coast salt sea air might be good for your lungs... and a beautiful place to see... but it's hell on aluminum parts. :) That black oxidation on Aluminum is a piece of work to remove...
If I ever go back I'm going to have to find a way to coat or treat the exposed parts some way to resist that oxidation. Maybe a whole lot of carwashes and that "Protectant" spray. :)
All this work, has given my head the time required to turn itself inside out trying to conjure alternatives to what had been "the Plan"... I may just end up with a shined up scooter..
Grab Your Handles and Ride
Brian
... You Should know better! You don't site your doors facing the prevailing wind! I don't care if you ARE behind a windbreak... it's just dumb... Man... You open that door and those gusts come a whooshin' in and send stuff flying everywhere...
Yeah sure, there's lights inside and I COULD close the door... Lil' 60 watt bulbs ten feet in the air and spaced about fifteen feet apart. It's like trying to light up a stadium with a bic lighter. ;)
So anyway... I got to polishing on those Yamaha wheels.. Honestly, I thought I was pretty screwed...
They appeared to have gone through some sort of a warzone... and I never saw it... just saw the wheels after. No idea of where it happened.
They looked like gravel just got in there and rolled around for a few miles... 'cept... I was never in any when they got dinged up.
Figured it would take damn near grinding to bring 'em back to anything respectable...
Lucky for me, it was one more time I've been found to be wrong... As it turns out, Yamaha has 'em coated with some variety of clear coat.
I don't know what did the damage but the damage is only to that clear coat.
I found that wet sanding with a fine sponge sanding pad takes that finish off and leaves a nice clean undamaged wheel behind...
Cool...
It's not an especially quick process... I suppose it might be if I used a coarser sponge sanding pad? buuuuuut... My thinking is I can do a lot of damage a lot slower... with the fine pad. ;)
That allows me more time to catch my self doing something wrong so I can... STOP!
So... slowly I go.
Got back to work on the saddlebags today... wind or no wind... and no wind could only be called a wish... When I made a run for a bit more sandpaper and some dust masks... it was pushing that truck around...which weighing maybe 8500 or so, takes some doing!
But... I got the "Bad" lid stripped down to and through the Gel Coat where needed...
The circled areas are where the cracks are... the "dotted" areas are some of the pinholed areas revealed when I started sanding the primer layer.
The gel coat on this particular lid seems to be total junk...
As soon as the top finish was gone and I started into the primer... the pinholes appeared...
...and penetrated a ways into the gel coat.
Luckily that ALL seems to be confined to the gel coat... which is the lighter blue colored area.
Where the cracking was the worst I took the gel coat clean off down to the fiberglass... which eliminated all those cracks. There seems to be no failure of the basic fiberglass itself, only a bad gel coat.
Thing is... THAT would have been clearly visible when it left the glass shop at Tsukayu and went to the paint shop to be primer painted. Either somebody didn't do his job or... company policy is screwin' the pooch (and the customer) just a bit.
Anyway, I finished taking off ALL of that grey layer, which is the primer...
So now the damaged lid is ready to coat with a layer or two of resin to seal it up.
Then primer and repaint...
Along with repainting the other lid and two tubs.
And then get 'em all hung back on the bike.
Tsukayu warranty is only 6 months. So... a "Good" price is not so good... when you have a failure at about 18 months of age that they won't make right... Life in the west.
The scrubbing of the fins on the jugs is going slowly too... that west coast salt sea air might be good for your lungs... and a beautiful place to see... but it's hell on aluminum parts. :) That black oxidation on Aluminum is a piece of work to remove...
If I ever go back I'm going to have to find a way to coat or treat the exposed parts some way to resist that oxidation. Maybe a whole lot of carwashes and that "Protectant" spray. :)
All this work, has given my head the time required to turn itself inside out trying to conjure alternatives to what had been "the Plan"... I may just end up with a shined up scooter..
Grab Your Handles and Ride
Brian
Friday, April 18, 2014
The Hits Just Keep on Coming
Got deep into the saddlebags yesterday. A refinish of them was required due to cracking in the paint on the curb side bag lid...
I figured just sand off the cracked paint...
clean off the dust... primer if I went through into the gel coat...
... and then I'd just rattle can on a fresh new coat of black... and a new clear coat...
Good Plan...
I hadn't but started sanding to remove the cracked paint...
... when I discovered that the cracks didn't originate in a failed paint coat...
... but in the underlying fiberglass...
I worked for a little while... searching out all the spots where the paint was cracked... I'd noticed the first little crack maybe a year ago.
Over time they multiplied... and sure enough...
Underlying each spot of cracked paint... the gel coat was spidered with a thin crack.
There was also no shortage of bad spots... at least it's only... as far as I can tell, the one single saddlebag lid.
So... work on the saddlebags is temporarily suspended... while I wait on some word from the manufacturer of the bags.
I'm not expecting any good news to be honest. My recent experience with companies and warranties has not been confidence building... but we'll see. I did at least get an automatic email response from the outfit.
It advised me they were "On Holiday" until the 22nd... so... I'll go do something else for a bit... maybe study up on Motorcycle Saddlebag Fiberglass repair.
At least my son-in-law who did the paint job can wipe his forehead and breathe easy... it wasn't His screwup. ;)
Grab Your Handles and Ride
Brian
I figured just sand off the cracked paint...
clean off the dust... primer if I went through into the gel coat...
... and then I'd just rattle can on a fresh new coat of black... and a new clear coat...
Good Plan...
Yeah... there I go planning again...
I hadn't but started sanding to remove the cracked paint...
... when I discovered that the cracks didn't originate in a failed paint coat...
... but in the underlying fiberglass...
I worked for a little while... searching out all the spots where the paint was cracked... I'd noticed the first little crack maybe a year ago.
Over time they multiplied... and sure enough...
Underlying each spot of cracked paint... the gel coat was spidered with a thin crack.
There was also no shortage of bad spots... at least it's only... as far as I can tell, the one single saddlebag lid.
So... work on the saddlebags is temporarily suspended... while I wait on some word from the manufacturer of the bags.
I'm not expecting any good news to be honest. My recent experience with companies and warranties has not been confidence building... but we'll see. I did at least get an automatic email response from the outfit.
It advised me they were "On Holiday" until the 22nd... so... I'll go do something else for a bit... maybe study up on Motorcycle Saddlebag Fiberglass repair.
At least my son-in-law who did the paint job can wipe his forehead and breathe easy... it wasn't His screwup. ;)
Grab Your Handles and Ride
Brian
Sunday, April 6, 2014
The Cleanup Work Continues
Not being a "body man" ... is not an asset when you're trying to do "minor" jobs...
Sanding the "shine" off saddlebags to repaint shouldn't be that big a deal should it... Ha... only me could make it be. Turns out... Fiberglass ain't that level, so even a quarter sheet sander with really fine sandpaper finds all sorts of low spots... and taking the "shine" off to repaint turns out to be a lot more work than it would seem. ;)
ah well... she'll look good once I get the job done.
I've been stalling during a patch of iffy and windy weather... too cold to paint so why sand... right? ha ha... good excuse for procrastination... and giving the vagaries of life an opportunity to bail my ass out of having to sell her off? ... yeah well... that hasn't worked yet...
Got the pipes back from the powder coater... He's done several motorcycle and atv exhaust systems and one set of sprint car headers... with this high temp (1000 degree) material and says after a few months he's seen no failures... so I took the $145 chance.
Yeah... unlikely to get that back... but my thinking ran this way... with the pipes UGLY... it just might interfere with selling at all... so... a "had to" sort of thing...
Big improvement over how they'd come to look. One thing I'll say... if I'm ever in the market for aftermarket pipes again... I will NEVER... buy Hard Chrome brand...
Maybe this failure of the finish IS just a weird freak that will never happen again... but that's not my problem... the Refusal of the Hard Chrome company to even communicate and address the issue is the deal... Their "Customer Service" in this instance SUCKED big time...
Fool me once, shame on you. Fool me twice... Shame on me... They'll not get a second chance.
The weather seems to be breaking and I'm nearing completion of the Stitching Horse I'm working on to help with the restarting of my Leather Shop... So I should be able to bring myself to get back onto the bike polishing in the next day or so...
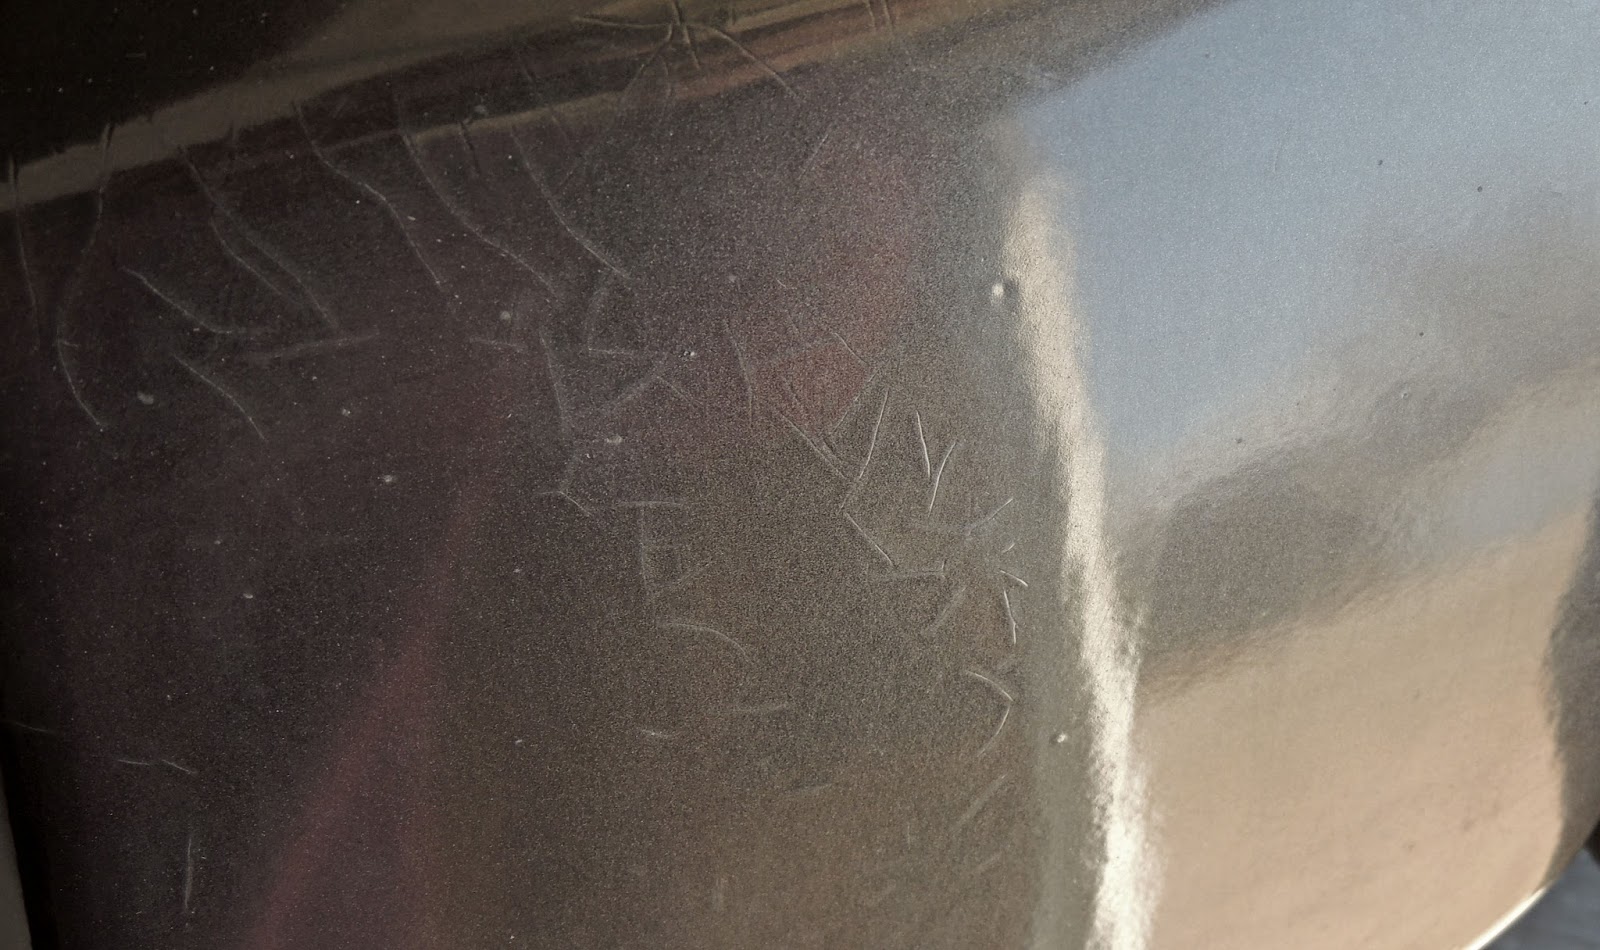
One issue I'm not sure what to do about are the wheels... Having been Not Shy about the roads we've wandered... those aluminum wheels have apparently gotten dinged pretty hard by gravel... 360 degrees...
Polishing by hand doesn't touch the gouges that can be felt... I can't decide whether to just leave it alone and accept it... or take a fine emery... and try to erase those marks... again... a lot of work... but the bike deserves it... just can't decide if I'm up for the task...
It would be another way to "Stall" the inevitable I guess...
Grab your handles and ride
Brian
Sanding the "shine" off saddlebags to repaint shouldn't be that big a deal should it... Ha... only me could make it be. Turns out... Fiberglass ain't that level, so even a quarter sheet sander with really fine sandpaper finds all sorts of low spots... and taking the "shine" off to repaint turns out to be a lot more work than it would seem. ;)
ah well... she'll look good once I get the job done.
I've been stalling during a patch of iffy and windy weather... too cold to paint so why sand... right? ha ha... good excuse for procrastination... and giving the vagaries of life an opportunity to bail my ass out of having to sell her off? ... yeah well... that hasn't worked yet...
Got the pipes back from the powder coater... He's done several motorcycle and atv exhaust systems and one set of sprint car headers... with this high temp (1000 degree) material and says after a few months he's seen no failures... so I took the $145 chance.
Yeah... unlikely to get that back... but my thinking ran this way... with the pipes UGLY... it just might interfere with selling at all... so... a "had to" sort of thing...
| *Custom Coatings in Berthoud Colorado - Refinished Motorcycle exhaust* |
Big improvement over how they'd come to look. One thing I'll say... if I'm ever in the market for aftermarket pipes again... I will NEVER... buy Hard Chrome brand...
| *Hard Chrome Big Straights finish Failure* |
Maybe this failure of the finish IS just a weird freak that will never happen again... but that's not my problem... the Refusal of the Hard Chrome company to even communicate and address the issue is the deal... Their "Customer Service" in this instance SUCKED big time...
Fool me once, shame on you. Fool me twice... Shame on me... They'll not get a second chance.
The weather seems to be breaking and I'm nearing completion of the Stitching Horse I'm working on to help with the restarting of my Leather Shop... So I should be able to bring myself to get back onto the bike polishing in the next day or so...
One issue I'm not sure what to do about are the wheels... Having been Not Shy about the roads we've wandered... those aluminum wheels have apparently gotten dinged pretty hard by gravel... 360 degrees...
Polishing by hand doesn't touch the gouges that can be felt... I can't decide whether to just leave it alone and accept it... or take a fine emery... and try to erase those marks... again... a lot of work... but the bike deserves it... just can't decide if I'm up for the task...
It would be another way to "Stall" the inevitable I guess...
Grab your handles and ride
Brian
Subscribe to:
Posts (Atom)


.jpg)